How to Enable Port Forwarding for the Linksys WRT1900ACS?
If you’re looking for really good and long-lasting wifi, routers, or extenders, Linksys can be considered. You can purchase these easily from Amazon or Linksys website itself. But before ordering makes sure you make a checklist of the features you’re looking for and then purchase it.
Now setting up your Linksys wifi is easy and doesn’t require any technical expertise. You can set it up by logging in through its online portal. The details it might ask like admin and password can be easily found on the label on the device. You can use the manual to make sure everything is done in a systemic manner.
To Enable Port Forwarding for the Linksys WRT1900ACS You can Keep Reading Further.
Port forwarding is a way that allows you to keep unwanted network traffic at bay. It can also protect your IP address and allow you to work securely. If you’re a gamer or like to stream gaming tournaments, port forwarding is a really good option for you.
It will make your network secure and you as an administrator would be able to hide the services being used on your network. In fact, you’d be surprised to know that proxies use this method of port forwarding only.
Now to Enable port forwarding for the Linksys WRT1900ACS, you can follow the steps we have listed down below.
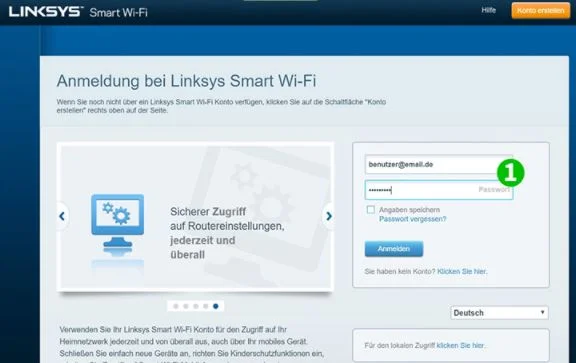
Step 1: Open your web browser and log in to your wifi or router through the website of Smart Wifi.
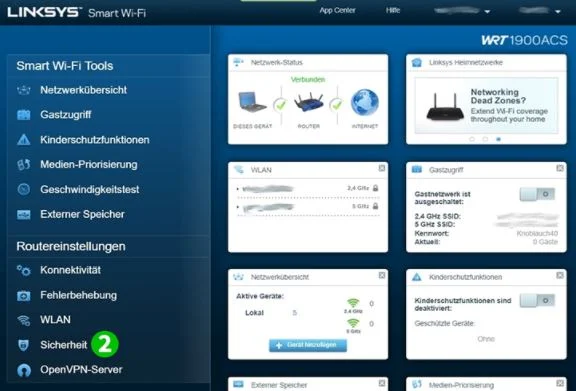
Step 2: A dashboard will open after you log in under Router settings and click on Security.
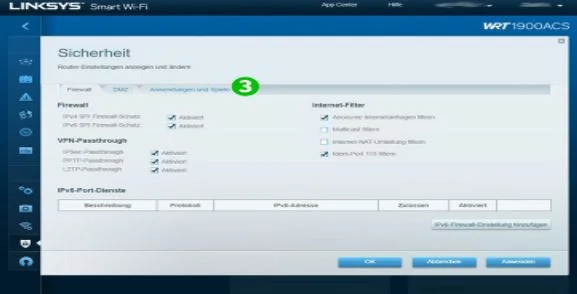
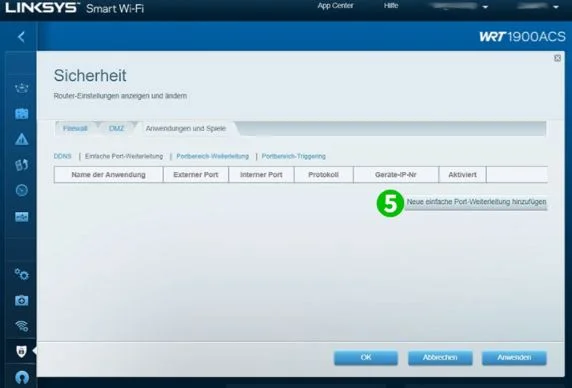
Step 3: Under the Security panel, navigate to the option of Applications and Gaming.
Step 4: You will find the sub-option of Single Port Forwarding.
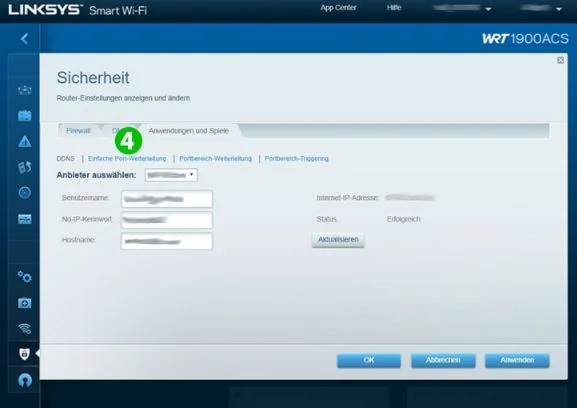
Step 5: Click on the option for New Single port forwarding.
Step 6: In the new line enter the numeric value of 80 for both external and internal portals.
Step 7: Check on the option of Both for the Protocol and enter the value cFos Personal Net into the field of To IP Address.
Step 8: Check the box to Enable port forwarding for the Linksys WRT1900ACS and it will be set.
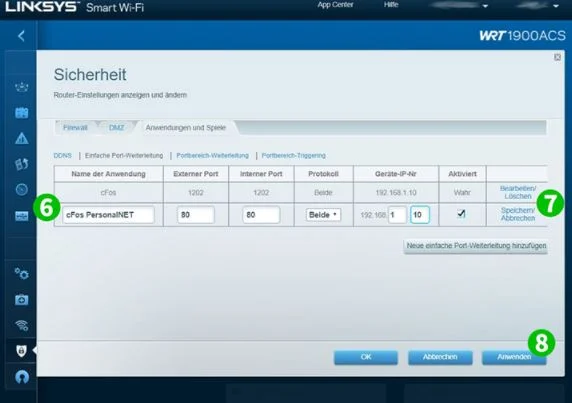
Step 9: To conclude the process, make sure you click on Save Settings.
Step 10: And Apply the changes you have made.
With this step-by-step guide, you can Enable port forwarding for the Linksys WRT1900ACS easily without much hassle. It is a no-brainer if steps are followed properly. And it makes your network security as well. In today’s era of increasing hacks, it is best that the network that you use is private. Port Forwarding is a great method you can follow instead of using proxies.
Popular Post